Table of Contents[Hide][Show]
I’ve had fun lately creating several different varieties of lotion bars. I started with the basic recipe and realized the options were truly endless for variations. Sometimes I’ll use a mold, but I like making lotion bar sticks too for even easier application. One of my favorites so far is this DIY sunscreen stick!
Mineral Sunscreen Stick
It’s basically a stick version of my homemade sunscreen. It also avoids all the harmful chemicals, parabens, and potential carcinogens in regular sunscreen. And it’s easier to apply than a cream since it’s in a bar or stick form which makes it easier for kids to do it themselves. It glides across skin for easy reapplication as needed.
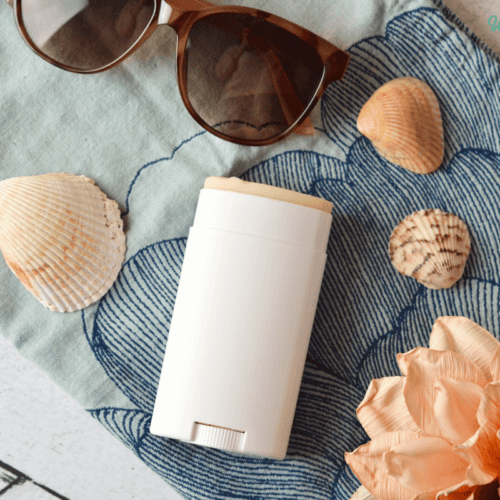
There are a few different ways to make these depending on how you like them. If you want some cute shapes and a handheld version, then use silicone molds. Muffin tins also work well if that’s what you have. The least messy option is to make a sunscreen stick with a twist-up tube or deodorant container.
It has hydrating ingredients that are moisturizing and great for sensitive skin. Because it’s basically a lotion bar with sun protection it’s perfect for dry skin too. If you’re prone to acne then this may not be the best sunscreen face stick option for you though. Coconut oil is not non-comedogenic, and neither is cocoa butter. Shea butter and mango butter though are much less likely to clog pores.
Sunscreen SPF
But first, let’s put on our science hats for a bit and geek out on the details of SPF. SPF stands for sun protection factor and tells how much UV protection you’ll get from your sunscreen lotion. It’s calculated by dividing the amount of sun exposure that causes the skin to get red by the amount that causes skin reddening without sunscreen. For example, if it takes the skin 30 times longer to burn with sunscreen on than without, that’s SPF 30.
However, this doesn’t take into account different skin types, skin tones, how much someone sweats, or other weather conditions. While many sunscreens are marketed as water resistant, this doesn’t mean they’re waterproof. If you’re in the water for several hours dermatologists recommend you reapply.
You’d think that a broadspectrum SPF 50 would have way more protection than SPF 15, but that’s not really the case.
- SPF 15 – Blocks 93% of UVB rays
- SPF 30 – SPF 40 – Blocks 97% of UVB rays
- SPF 50 – Blocks 98% of UVB rays
There are also two different types of rays, UVB and UVA. UVB rays cause skin reddening while UVA does not. A broad-spectrum sunscreen will cover both, but UVB is what SPF is rated for.
Chemicals in Sunscreen
Skincare companies use chemicals like oxybenzone and octinoxate in sunscreen to absorb sun rays. Research has found these are absorbed into the body in unsafe amounts and can cause problems like hormone disruption. Sun sticks that promise ultra-sheer coverage are more likely to use risky chemicals. Sunscreen sprays are another option often full of harmful chemicals.
Drugstore brands like Neutrogena, Cerave, Aveeno, Sun Bum, and Cetaphil sheer mineral sunscreen stick all have ingredients I’d rather avoid. Other popular sunscreen brands include Supergoop, Eltamd, and Shiseido. These all score high on EWG for toxic ingredients. Another good reason to make your own!
Other more natural options are ingredients like titanium dioxide and zinc oxide. These sit on top of the skin and block UVB rays. I always opt for non-nano zinc oxide since the particles aren’t small enough to be absorbed into the bloodstream. Mineral-based sunscreens are reef-safe and the safest and best sunscreen options for the skin.
Ingredients in DIY Sunscreen Sticks
I use coconut oil in these because it has a mild SPF on its own and adds a nice texture. If you have a coconut allergy then you can replace the coconut oil with a mix of liquid oil and more beeswax. Mango and shea butter both have a natural SPF of 4 and help moisturize and protect skin.
Beeswax helps thicken everything up and the zinc oxide provides protection from the sun’s rays. I also like adding vitamin E to extend the shelf life and add some skin-nourishing antioxidants. You can make a fragrance-free version or add essential oils for a nice scent and added skin benefits.
Certain essential oils are phototoxic, meaning they can cause burns if applied before sun exposure. Do NOT use lime, lemon, or bergamot essential oil in this sunscreen! Grapefruit may be phototoxic, but the jury is still out on that one. Other citrus options like sweet orange, tangerine, and mandarin don’t have this problem.

Homemade Sunscreen Sticks
These DIY sunscreen sticks are easy to apply, even for little ones! Use silicone molds for fun designs, or use tubes for even less mess.
Instructions
-
Combine the coconut oil, shea butter, and beeswax in a double boiler. You can also use a glass bowl over a smaller saucepan filled with a few inches of water.
-
Bring the water to a boil and stir ingredients until melted.
-
Remove from the heat and add the zinc oxide powder, vitamin E oil, and essential oils. More zinc oxide gives you more sun protection, but it also makes a thicker layer on the skin.
-
Pour into your molds or tubes and allow to cool completely.
-
Store at room temperature or in the fridge. Keep below 80 degrees or they’ll start to melt.
Notes
- You can use different shaped molds for different designs or use a square baking pan and cut them into bars.
- You can use any amount of shea, cocoa, or mango butter you want as long as they total 1/2 cup.
- Experiment with how much zinc oxide you need to use for your skin type and sun exposure needs.
What SPF is Homemade Sunscreen?
The short answer here, is I don’t know. No one does without extensive (and expensive!) testing. Because this is a homemade product not made in a lab I can’t guarantee exact SPF amounts and I’m not going to try to guess. However, with the amount of zinc oxide used and from my family’s personal experience using this I can say we’ve had good results.
Natural sunscreen needs to be reapplied every few hours and after swimming. Normally I like to use hats, sun-protective clothing, and shade whenever possible.
Storing Your Sunscreen Sticks
I recommend keeping your sunscreen sticks in the cooler if you take them to the beach. They’ll start to get soft in higher temperatures. These sunscreen sticks store well at room temperature though.
I’d also encourage experimenting with how much coverage you want based on how much Zinc Oxide you add to the recipe. These have a smoother, thinner, and more waterproof coverage than my basic sunscreen recipe.
Don’t Forget Your Vitamins!
When possible, it’s also important to spend some time in the sun without sunscreen for vitamin D production. I try to get a few minutes of morning sunlight each morning, plus more in the afternoons. And of course, it’s really important to eat your sunscreen! There are also supplements and high-nutrient foods that help us avoid burning when we don’t use sunscreen.
About this time of year, I start taking a specific regimen of supplements that help reduce inflammation and improve sun tolerance. Here’s what I take:
- Vitamin D3 (I take about 5,000 IU/day)- Emerging evidence shows that optimizing blood levels of Vitamin D can have a protective effect against sunburn and skin cancer. Here’s where I get it.
- Vitamin C – (I take about 2,000 mg/day)- A potent anti-inflammatory and it’s good for the immune system too. What I use.
- Coconut Oil– the Medium Chain Fatty Acids and saturated fat are easily utilized by the body for new skin formation and are protective against burning. I don’t use this as much anymore since my body does better with fewer saturated fats.
- Fish Oil – I like to get my fish oil naturally from low-mercury fish options like salmon and sardines. These healthy Omega-3s reduce inflammation and help protect skin. Here’s what I use when I need a fish oil supplement.
- Astaxanthin– A highly potent antioxidant that research shows acts as an internal sunscreen. It’s also anti-aging, anti-inflammatory, plus other benefits! I use this one.
Do you use sunscreen? What kind do you use? Share below!
